How to customize UINavigationBar and UIAlertController color in Xamarin.iOS
Hey, folks! How’s it going? It’s been a while since I wanted to write here on the blog. Fortunately, today I have the opportunity to share with you something I learned in the last few days. This post talks about customizing the styles of some UI elements in Xamarin.iOS in apps developed with Xamarin.Forms. Let’s get started!
To illustrate, I created a new app with Xamarin.Forms. In it, I added a home page with a navigation bar and placed two buttons in the body of the page and another button on the navigation bar. After compiling on iOS, I got this marvelous result:
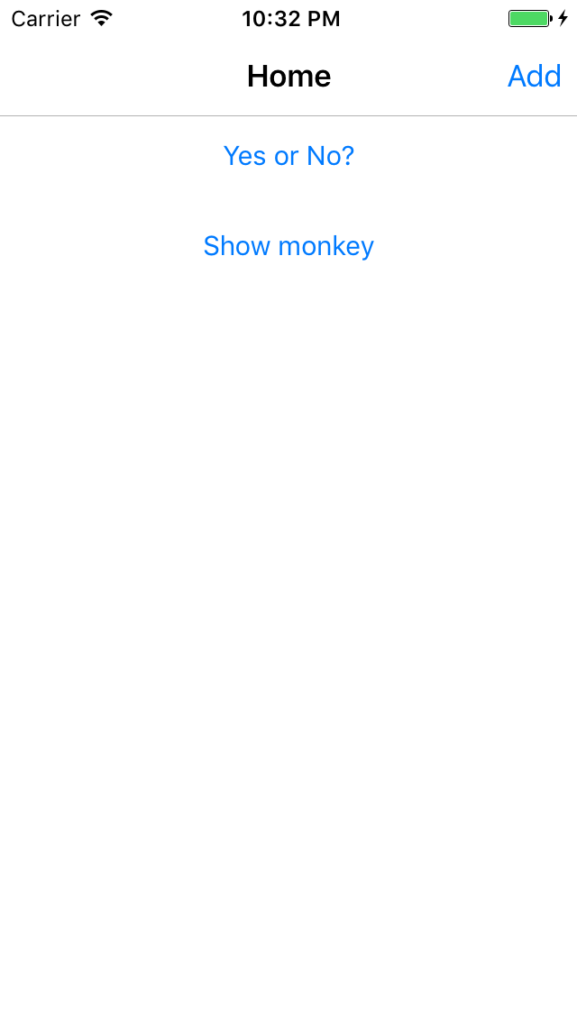
Looks nice, right? Now try showing it to someone who expects the app to be beautiful. It will probably be a disaster! What’s the next step then? Those who said “customize the colors” got it right. But how to do it? The simplest and fastest way is to add a style to the resources of our shared project and customize the background color of the navigation bar and its text color. The file we’re talking about is App.xaml. We customize it like this:
<?xml version="1.0" encoding="utf-8"?>
<Application xmlns="http://xamarin.com/schemas/2014/forms" xmlns:x="http://schemas.microsoft.com/winfx/2009/xaml" x:Class="Core.App">
    <Application.Resources>
        <ResourceDictionary>
            <Color x:Key="MainColor">#48bb6f</Color>
            <Color x:Key="MainBarTextColor">White</Color>

            <Style TargetType="NavigationPage">
                <Setter Property="BarBackgroundColor" Value="{StaticResource MainColor}" />
                <Setter Property="BarTextColor" Value="{StaticResource MainBarTextColor}" />
            </Style>
        </ResourceDictionary>
    </Application.Resources>
</Application>
The result is:

Wow! Now I’m a designer! Just kidding 🙂 However, there are still those buttons that remain with the default iOS style, in blue. Let’s customize them too, by simply adding another style to the resources:
<?xml version="1.0" encoding="utf-8"?>
<Application xmlns="http://xamarin.com/schemas/2014/forms" xmlns:x="http://schemas.microsoft.com/winfx/2009/xaml" x:Class="Core.App">
    <Application.Resources>
        <ResourceDictionary>
            <Color x:Key="MainColor">#48bb6f</Color>
            <Color x:Key="MainBarTextColor">White</Color>

            <Style TargetType="NavigationPage">
                <Setter Property="BarBackgroundColor" Value="{StaticResource MainColor}" />
                <Setter Property="BarTextColor" Value="{StaticResource MainBarTextColor}" />
            </Style>

            <Style TargetType="Button">
                <Setter Property="TextColor" Value="{StaticResource MainColor}" />
            </Style>
        </ResourceDictionary>
    </Application.Resources>
</Application>
Now it looks much better…

You feel proud of your “all styled” app and decide to implement a button that should ask the user a question. After implementing it, you test it and…
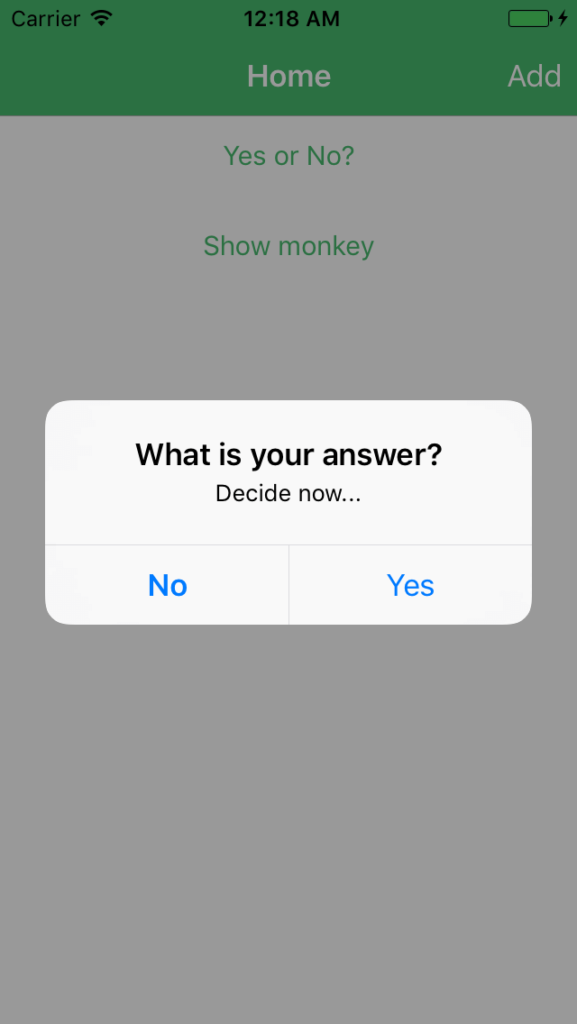
Oh, look at the blue button again… You say:
...but I changed the button's color, I swear...
The programmer is not wrong, but the thing is, this button belongs to UIAlertController and is outside the scope of the Button styling we did in Xamarin.Forms. What now? Don’t worry, we have to do some customization in Xamarin.iOS to get the desired result. Cool, but how do we do it?
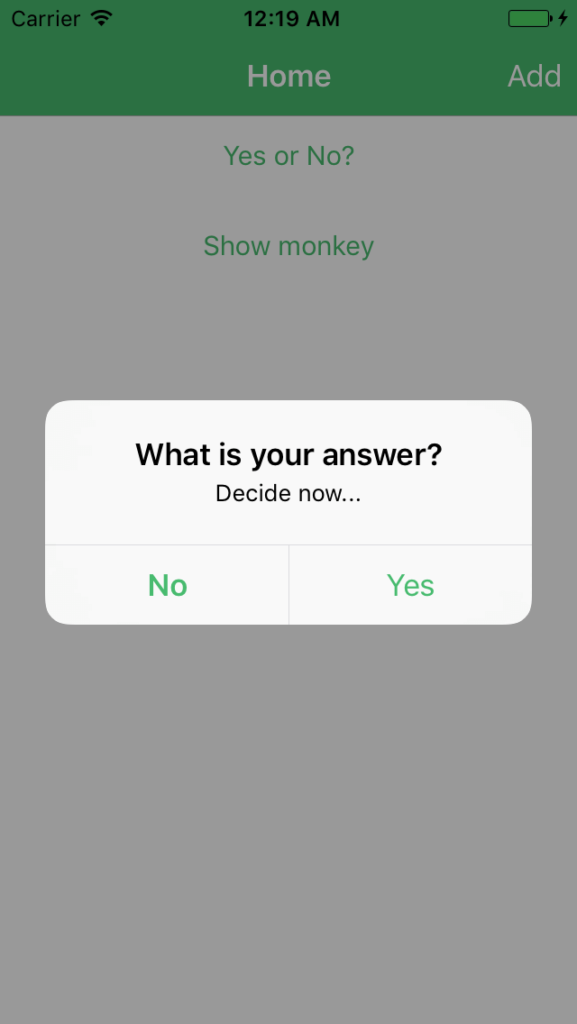
In AppDelegate.cs, we will create a new method to define our custom styles, which I named BuildStyles in this example project. As I had already defined the default colors in the shared project’s resources, I loaded these resources and the defined colors, then converted the Xamarin.Forms Color to iOS UIColor, and finally applied the style to a specific UIKit object.
As the component we want to style is UIAlertController, I initially looked for the Appearance property in this object but without success. I later found out that the UIView object would be responsible for styling not only UIAlertController but also other iOS UI elements. In the end, I called the style method in FinishedLaunching after calling Xamarin.Forms because the style method uses Xamarin.Forms resources, so keep that in mind.
using Foundation;
using UIKit;
using System;

public partial class AppDelegate : global::Xamarin.Forms.Platform.iOS.FormsApplicationDelegate
{
    public override bool FinishedLaunching(UIApplication app, NSDictionary options)
    {
        global::Xamarin.Forms.Forms.Init();

        LoadApplication(new App());
        BuildStyles();

        return base.FinishedLaunching(app, options);
    }

    private void BuildStyles()
    {
        var xfResources = Xamarin.Forms.Application.Current.Resources;
        if (xfResources == null)
            return;

        var mainColor = "MainColor";
        var mainBarTextColor = "MainBarTextColor";

        if (!xfResources.ContainsKey(mainColor) || !xfResources.ContainsKey(mainBarTextColor))
            return;

        var xfMainColor = (Xamarin.Forms.Color)xfResources[mainColor];
        var xfMainBarTextColor = (Xamarin.Forms.Color)xfResources[mainBarTextColor];

        var uiMainColor = UIColor.FromRGB(
            (nfloat)xfMainColor.R,
            (nfloat)xfMainColor.G,
            (nfloat)xfMainColor.B
        );

        var uiMainBarTextColor = UIColor.FromRGB(
            (nfloat)xfMainBarTextColor.R,
            (nfloat)xfMainBarTextColor.G,
            (nfloat)xfMainBarTextColor.B
        );

        UIView.Appearance.TintColor = uiMainColor;
    }
}
Now the programmer is excited and says:
I told you I did it...
Finally, let’s do one more implementation, which consists of displaying an image using the default file viewer of each platform. In this example, we will use DependencyService to invoke iOS’s QuickLookPreview to display an image that is in the Resources folder of the platform. Let’s see how it looks:

Huh, but… Where’s the navigation bar with that smart color we defined?? Yes, we defined it, but we did it on the NavigationPage object of Xamarin.Forms. Since we used DependencyService to call a view directly from iOS, the style settings remained the default iOS ones, that’s why we see that white bar again.
At least the Done button and the sharing button are green, but that’s thanks to the UIView styling; otherwise, they would be blue.
Now, how do we solve this? Let’s go back to AppDelegate.cs in the style method we created, and let’s add the style to UINavigationBar.
private void BuildStyles()
{
    var xfResources = Xamarin.Forms.Application.Current.Resources;
    if (xfResources == null)
        return;

    var mainColor = "MainColor";
    var mainBarTextColor = "MainBarTextColor";

    if (!xfResources.ContainsKey(mainColor) || !xfResources.ContainsKey(mainBarTextColor))
        return;

    var xfMainColor = (Xamarin.Forms.Color)xfResources[mainColor];
    var xfMainBarTextColor = (Xamarin.Forms.Color)xfResources[mainBarTextColor];

    var uiMainColor = UIColor.FromRGB(
        (nfloat)xfMainColor.R,
        (nfloat)xfMainColor.G,
        (nfloat)xfMainColor.B
    );

    var uiMainBarTextColor = UIColor.FromRGB(
        (nfloat)xfMainBarTextColor.R,
        (nfloat)xfMainBarTextColor.G,
        (nfloat)xfMainBarTextColor.B
    );

    UINavigationBar.Appearance.BarTintColor = uiMainColor;
    UINavigationBar.Appearance.TintColor = uiMainBarTextColor;
    UINavigationBar.Appearance.SetTitleTextAttributes(
        new UITextAttributes() { TextColor = uiMainBarTextColor }
    );
    UIView.Appearance.TintColor = uiMainColor;
}
First, we set the color in the navigation bar (line 28). Then we define the color of the buttons’ text present in the navigation (line 29). Lastly, we modify the color of the text present in the navigation bar (lines 30, 31, and 32).
Now, look what we have…

There you go! Now you have learned how to perform some customizations on the styles of Xamarin.iOS elements.
The project I used as an example is on Github, here.
What do you think? Leave your comment with your opinion, suggestion, criticism, or compliment.
Cheers, and until next time!